
Running Frigate on Proxmox
Frigate is an open source network video recorder (NVR) that uses AI to detect objects inside your video camera streams. I’ve been using it for years to reliably detect people… and foxes, in my home security camera footage.
I used to run my smart home on Docker, but more recently have switched to Proxmox, a virtualisation environment/hypervisor. According to the documentation, running Frigate on Proxmox is not recommended or supported, but I managed to get it working anyway. I’ve been running it for three months now without any issues and great performance. I even got my USB Coral TPU Accelerator working with it too!
This article will show you how I got it up and running at home.
Create an LXC running Docker Compose
This part seems a little stupid, running a Docker environment inside an LXC container in Proxmox, but it was the simplest way I could get this up and running. I used the Docker LXC creation script from the Proxmox Helper Scripts library.

SSH into your Proxmox server, or use the shell in the web interface, and paste in the bash command from the helpers website.
bash -c "$(wget -qLO - https://github.com/tteck/Proxmox/raw/main/ct/docker.sh)"
You should now see the LXC creator wizard on screen.
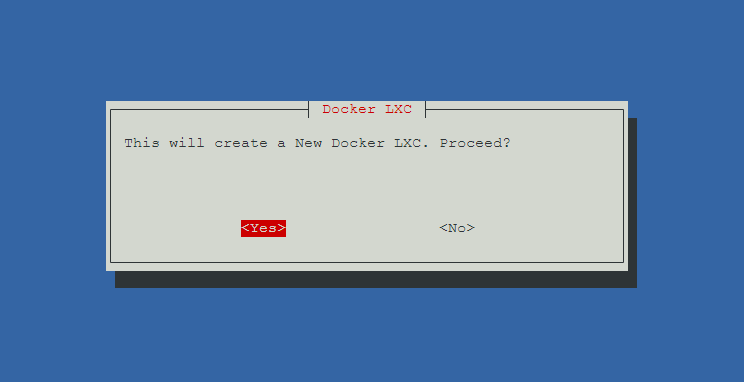
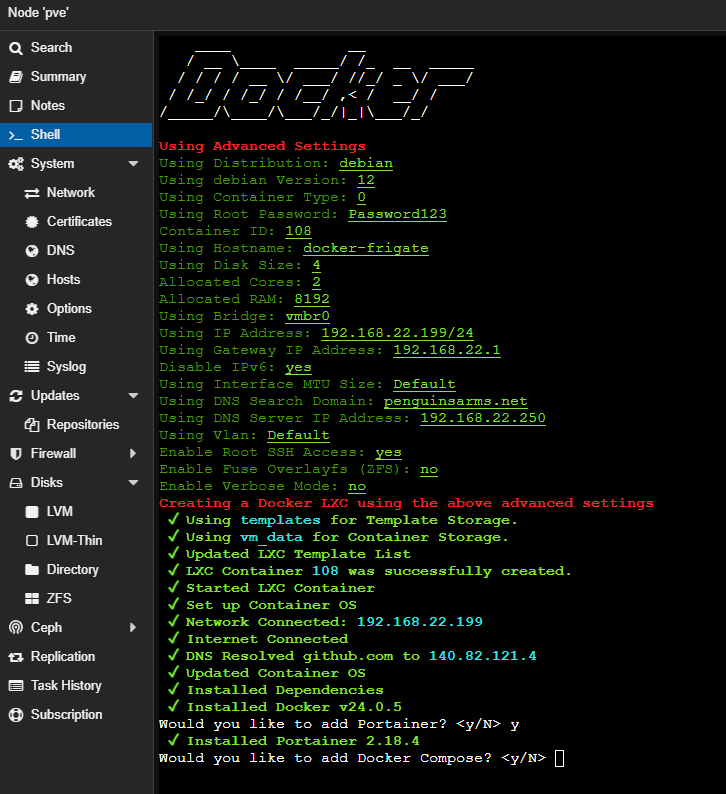
Choose Advanced settings, and enter these settings when prompted.
Distribution: Debian
Version: The latest one (I chose 12 Bookworm)
Type: Privileged (I believe this is needed to map through the USB Coral TPU)
Password: Whatever you want!
Container ID: Leave as default, but make a note of it, we’ll need it later.
Hostname: Docker-Frigate
Disk Size in GB: I set mine to 4GB, because I don’t intend on storing video clips on there. You should choose a bigger size if you’re intending on storing your clips and footage inside the container.
CPU Cores: 2
RAM: 8GB (8192 MiB)
Bridge: Leave as default
IP Address: Set a static IP address relevant for your home network, and don’t forget to add the /24 to the end (Assuming you have a 255.255.255.0 subnet mask). Also add your correct Gateway and DNS server IP addresses. I also disabled IPv6 as I don’t use it at home.
Enable Root SSH Access: Yes
ZFS Fuse OverlayFS: I have no idea what that is, so I chose No
Verbose Mode: No
Once you’re done with all these settings, it should start creating the container. When Prompted, select Yes to installing Portainer and Docker Compose.
Once it’s all finished, you should be able to open up a browser and navigate to the IP address you specified for the container and port 9000 to open up Portainer. If that shows up, everything has worked as expected so far!

Map through the storage for video clips
I don’t want to store my Frigate video clips and recordings inside my LXC container, so I am going to map through a directory from my Host storage to the LXC container. I have two fat hard disks in a mirror, so I want the clips to live there. This will keep them safe if something happens to one of my disks, or if the container gets deleted for any reason. For more information on how I’ve set up my Proxmox server, check out the article I wrote about it.
If you want to store your clips inside the container itself, just make sure you give it enough disk space when you create it and you can skip this step.
I created a new directory on this disk called cctv_clips.

We now need to mount through this directory from the HOST to the LXC container using the pct set command. The command follows this structure:
pct set <CONTAINER ID> -mp0 <PATH_TO_DIRECTORY>,mp=<MOUNT_POINT>You’ll need to add the container ID, and the paths to where you want to store the clips and recordings. Here is what I’ve used in mine
pct set 108 -mp0 /data/cctv_clips,mp=/cctv_clipsThis will mount the /data/cctv_clips directory into a directory accessible inside the container at /cctv_clips.

You can then navigate to the container itself, click on the Resources part and you should see the mount point you just created.

Mapping through the USB Coral TPU and Hardware Acceleration
We want to be able to take advantage of the USB Coral TPU that I have plugged in to my Proxmox Host server, as well as the Hardware Acceleration capabilities of my Intel CPU. To do this we need to map them through to the container itself.
Back in the console or shell of the Proxmox server, we need to edit the LXC file and add a few lines. These worked on my system, but you may need to change them if you have a different CPU or Coral device.
Navigate to the /etc/pve/lxc directory and use the nano text editor to edit the configuration file of your container. The file is named by the container ID.

Add the following two lines to the bottom of the file.
lxc.mount.entry: /dev/dri/renderD128 dev/dri/renderD128 none bind,optional,create=file 0, 0
lxc.mount.entry: /dev/bus/usb/002/ dev/bus/usb/002/ none bind,optional,create=dir 0,0
The first line maps through the Intel Hardware acceleration and the second line maps through the USB ports.

Save the file, and then restart the docker-firgate container for good measure.
Create the Docker Compose file
Now go to the shell or console of the docker-frigate container and navigate to the /opt directory.
In that directory, you can run the following command to create a new Docker Compose file.
nano docker-compose.yamlThen, paste in the following Docker Compose script.
version: '3.9'

services:

  frigate:
    container_name: frigate
    privileged: true
    restart: unless-stopped
    image: ghcr.io/blakeblackshear/frigate:stable
    shm_size: "128mb" # update for your cameras based on calculation above
    devices:
      - /dev/bus/usb:/dev/bus/usb
      - /dev/dri/renderD128 # for intel hwaccel, needs to be updated for your hardware
    volumes:
      - /etc/localtime:/etc/localtime:ro
      - /opt/frigate/config:/config:ro
      - /cctv_clips:/media/frigate
      - type: tmpfs # Optional: 1GB of memory, reduces SSD/SD Card wear
        target: /tmp/cache
        tmpfs:
          size: 1000000000
    ports:
      - "5000:5000"
      - "1935:1935" # RTMP feeds
    environment:
      FRIGATE_RTSP_PASSWORD: "myPassword"
You can see in the Volumes section that I’ve mapped the /cctv_clips mount point to the /media/frigate directory. This is where Frigate stores its clips and recordings by default, so you will need to remove this line if you are not using a mount point.
Save the file and exit out of Nano.
Configure Frigate
Back at the console of the docker-frigate LXC, we now need to create a directory for frigate to store it’s configuration file in. Use the mkdir command to create a directory inside the /opt directory called frigate, then a directory inside there called config.
mkdir /opt/frigate
mkdir /opt/frigate/config
Now use the nano editor to create a configuration file for Frigate called config.yml
nano /opt/frigate/config/config.ymlHere is my basic Frigate configuration file, you will need to change the RTSP URLs to match your own camera. You can find more information about Frigate and the configuration file on the Frigate website, or in the article I wrote about it on my blog.
mqtt:
  enabled: false
ffmpeg:
  hwaccel_args: preset-vaapi
detectors:
  coral:
    type: edgetpu
    device: usb
#Global Object Settings
objects:
  track:
    - person
  filters:
    person:
      min_area: 5000
      max_area: 100000
cameras:
  FrontCam:
    ffmpeg:
      inputs:
        # High Resolution Stream
        - path: rtsp://192.168.22.1:7447/P6C9GcVoZ8mRmYor
          roles:
            - record
        # Low Resolution Stream
        - path: rtsp://192.168.22.1:7447/s0Wju46GtlXua3J4
          roles:
            - detect
    detect:
      width: 480
      height: 360
      fps: 24
Save the file and you should be ready to go!
Starting Frigate
You can now navigate to your /opt directory and start the container using the docker command
docker compose up -dIf all worked well, you should be able to go to the IP address of your docker-frigate container with port 5000 and see Frigate running!

If you can’t access Frigate, then try checking the container log files in Portainer.
