
Configuring the Mosquitto MQTT Docker container for use with Home Assistant
You may have heard the term MQTT come up when people start talking about their Home Automation setups. Usually you hear it alongside things like Zigbee or Z-Wave, and Home Assistant.
In this post I'm going to show you how to install the Mosquitto Docker Container, using Docker Compose, for those of using the Home Assistant Container version. This guide assumes that you:
Have SSH access to it
Are using Docker Compose
This blog post is a companion post to this YouTube video
Setting up the Mosquitto MQTT Broker
Firstly, you will need to add the Mosquitto container settings to your docker-compose.yaml file. I edit my docker compose file using VSCode over SSH.
Add the following to your Docker Compose file:
 mosquitto:
    image: eclipse-mosquitto
    container_name: mosquitto
    volumes:
      - /opt/mosquitto:/mosquitto
      - /opt/mosquitto/data:/mosquitto/data
      - /opt/mosquitto/log:/mosquitto/log
    ports:
      - 1883:1883
- 9001:9001 
Docker Compose file in VS Code
Use the New Folder button at the top of the remote explorer to create a new folder in your /opt directory called mosquitto. Then create another folder under that called config.
Then use the New File button to create a new file inside the config folder and name it mosquitto.conf.

New Folders and Files created in VSCode
Paste the following into the mosquitto.conf file and save it.
persistence true
persistence_location /mosquitto/data/
log_dest file /mosquitto/log/mosquitto.log
listener 1883

## Authentication ##
allow_anonymous true
Now SSH into your Linux computer (Or click the Terminal menu at the top of VSCode and then New Terminal) and run the following command to create the new container. This will need to be run in your /opt directory (Or wherever you have your Docker Compose file stored)
docker-compose up -dThis will start your Mosquitto Docker container.
Setting up authentication for Mosquitto
You can choose to keep your MQTT broker opened up, which means that any device on your network is able to publish or subscribe to MQTT topics without any restrictions.
I think this is a bad idea, so I like to force authentication on my Mosquitto broker. Anything that wants to write or read from my MQTT broker will need to have the correct username and password.
If you don't want to set up authentication, you can change the allow_anonymous line in the configuration above to true so that the whole configuration looks like this:
persistence true
persistence_location /mosquitto/data/
log_dest file /mosquitto/log/mosquitto.log
listener 1883

## Authentication ##
allow_anonymous true
But, I strongly urge you to set up authentication. Firstly, go to your mosquitto container in Portainer and click on the console link.

Mosquitto container in Portainer, showing the console link.
Select the /bin/sh shell and click connect. This will load up a terminal/shell directly into the Mosquitto docker container so we can run some Mosquitto specific commands.

Now run this command to create a new MQTT user and password for authentication.
mosquitto_passwd -c /mosquitto/config/password.txt hassThis uses the mosquitto_password command with the -c switch (Which stands for create) to create a new user in the /mosquitto/config/password.txt file with a username of hass.
You'll now be prompted to enter a password and to confirm it. Type a password for your user here.
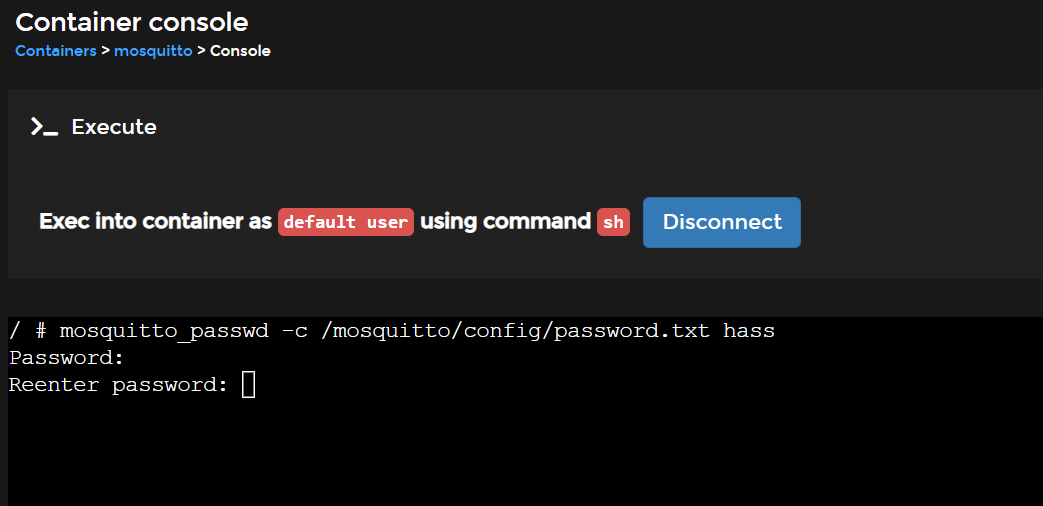
Creating the hass MQTT user
You can now switch back to VSCode and uncomment out the authentication lines.

mosquitto.conf file in VSCode showing uncommented out authentication lines.
Now save the file. If you get a permission denied error message when trying to save the file you can open a new terminal to the linux server (Or SSH into it) and then run the following command to take ownership of all files in the /opt directory. This is where I store all my Docker configuration files.
sudo chown <username> -R /optBe sure to replace <username> with the user name you use to log in to your Linux server.
Once you've done this you should be able to save the file correctly. Make sure those two lines are uncommented out.
allow_anonymous false
password_file /mosquitto/config/password.txt
Once you've saved the file you will need to go back to portainer and restart the Mosquitto docker container for the changes to take effect.

Mosquitto container in Portainer showing the restart button
Congratulations! You now have the Mosquitto broker running in a Docker container, protected by a username and password, and you can now connect up Home Assistant to it with the official MQTT integration.
Connecting Home Assistant to the MQTT Broker
In Home Assistant, navigate to the Configuration menu and to the Integrations page.
Click the Add Integration button at the bottom right, and search for the MQTT integration.
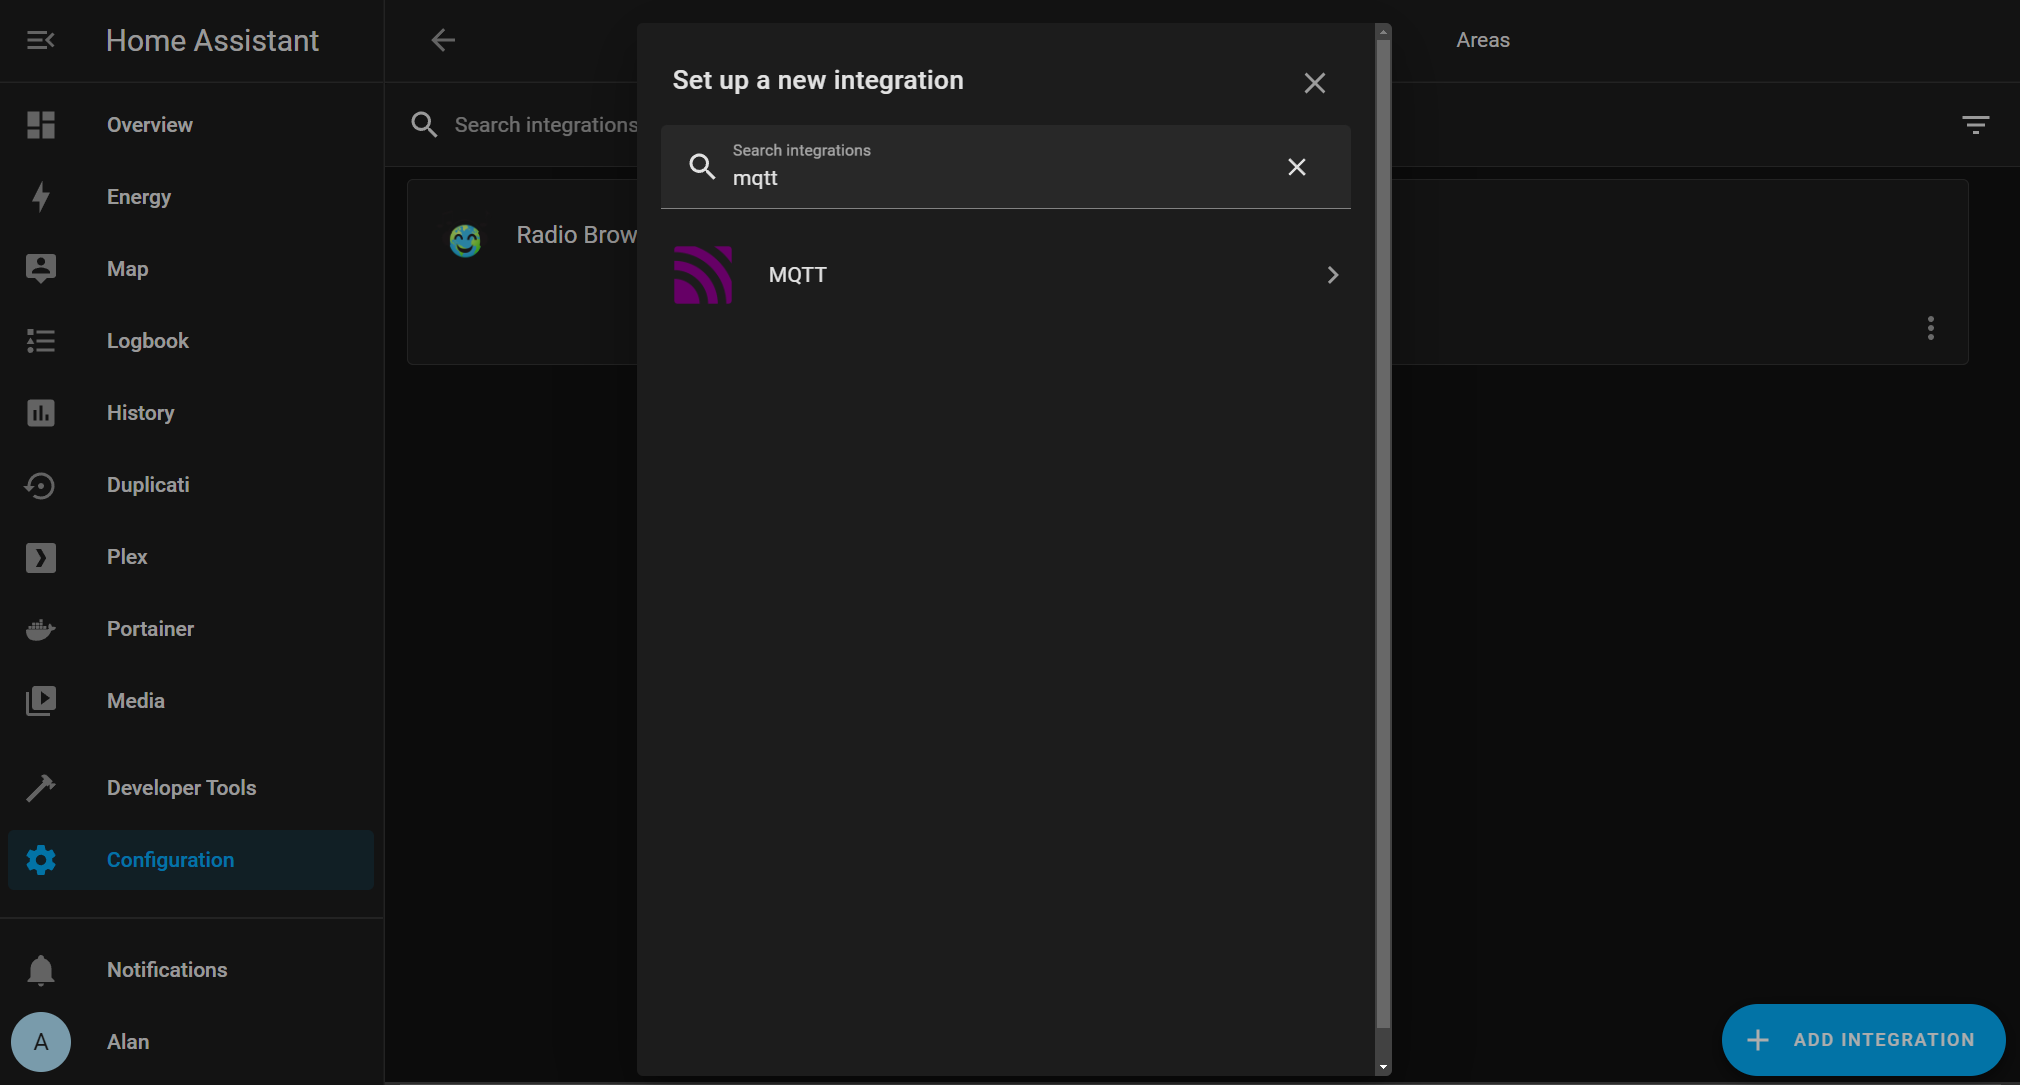
Home Assistant showing the MQTT integration
Click on the MQTT integration.
Type the IP Address of your linux server in as the Broker address, leave port 1883 as default and then enter the username and password for the hass MQTT user you created in the previous step.

MQTT Integration settings
Click Submit and you should see a success message!

And there you go - you now have MQTT set up and running in Home Assistant!