
Installing Docker, Home Assistant and Portainer on Ubuntu Linux
I run my smart home on an Intel NUC computer, running Ubuntu Linux and Docker. This allows me to run many different smart home services as containers, including Home Assistant.
This blog post is a companion post to my YouTube video showing you how to install Docker, Docker Compose, Portainer and Home Assistant on Ubuntu Linux. This combination of applications forms an ideal foundation for any advanced smart home.
If you're not sure what Docker is, or why I use it in my smart home, check out my YouTube playlist which explains it all really simply.
Check out the YouTube video showing the end to end journey for installing Docker, Home Assistant and Portainer on Ubuntu.
Before you get started you will need a few things:
A dedicated computer, laptop or Intel NUC PC. I personally use an Intel NUC PC and it's been great for running dozens of services.
Ubuntu Linux installed. You can follow the instructions here to get it installed.
A Static IP address assigned to the Ubuntu Linux computer.
The ability to SSH into this Linux installation with a user that has root/sudo permissions.
Installing Docker
The first thing we'll do is install Docker. I find it easiest to follow the steps on the official Docker installation page.
First SSH into the Ubuntu server.

SSH into your Ubuntu Server
Now we'll install the Docker Engine for Ubuntu by running the following commands.
First we remove any older versions of Docker Engine, if they exist. You'll probably have none if this is a fresh install of Ubuntu Server
sudo apt-get remove docker docker-engine docker.io containerd runcNow we update the apt package index and allow it to use HTTPS with these two commands.
sudo apt-get update

sudo apt-get install \
    ca-certificates \
    curl \
    gnupg \
    lsb-release
Add Dockers official GPG key to the KeyRing
curl -fsSL https://download.docker.com/linux/ubuntu/gpg | sudo gpg --dearmor -o /usr/share/keyrings/docker-archive-keyring.gpgSet up the file repository for the Stable version of Docker (You can run a beta or experimental one if you want, but I prefer to use the stable versions)
echo \
  "deb [arch=$(dpkg --print-architecture) signed-by=/usr/share/keyrings/docker-archive-keyring.gpg] https://download.docker.com/linux/ubuntu \
  $(lsb_release -cs) stable" | sudo tee /etc/apt/sources.list.d/docker.list > /dev/null
Finally, install the Docker engine using these two commands
sudo apt-get update
sudo apt-get install docker-ce docker-ce-cli containerd.io
Congratulations! You now have Docker installed!
You can verify that everything is working by running the Hello World docker container. If everything is working properly you'll see the container output a message to the screen and shut itself down.
sudo docker run hello-world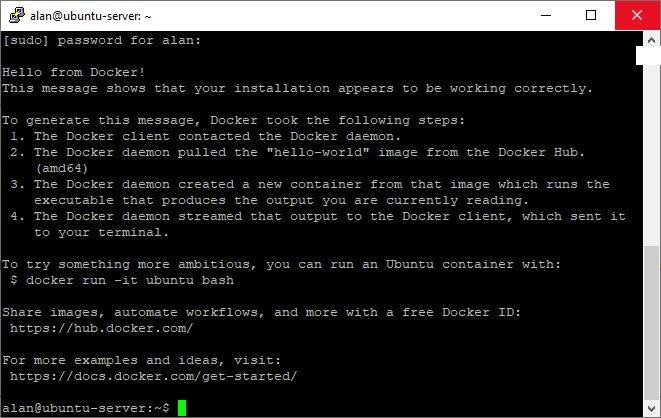
Manage Docker as a non-Root user
I find it easiest if I can manage Docker as a non-Root user - it means I don't need to add sudo to the start of every command. This may reduce the security of my Docker environment, but because it's running in my own network, inaccessible from the outside world I'm willing to accept that risk.
To get Docker to work as a non-root user we need to add our user to the Docker group. Let's do that now.
First, create the Docker group if it doesn't already exist.
sudo groupadd dockerNow add your user account to that Docker group.
sudo usermod -aG docker $USERNow log out and back in again for the permission changes to take effect. If everything has worked properly, you should be able to re-download and run the Hello World Docker container without using sudo.
docker run hello-worldInstalling Docker Compose
Docker Compose is a really handy utility that allows you to create and configure Docker containers using a YAML file. This makes it really easy to create and configure many containers at once, and also to backup your environment.
Installing Docker Compose is really easy, just copy and paste a few more commands into the SSH terminal. We start by downloading the current, stable release of Docker Compose.
sudo curl -L "https://github.com/docker/compose/releases/download/1.29.2/docker-compose-$(uname -s)-$(uname -m)" -o /usr/local/bin/docker-composeNow we set the permissions on the downloaded files to allow us to run them.
sudo chmod +x /usr/local/bin/docker-composeAnd we're done! Docker Compose is now installed and we can test this by running it and having it output the version.
docker-compose --versionIf everything has worked as expected, you should see the version information displayed on screen.

Installing Portainer
Portainer is a graphical user interface that allows you to view and manage your Docker containers. It makes it way easier to interact with Docker and I highly recommend that you install it. The best part is, it can actually be installed on Docker itself!

Portainer showing the Docker containers that I use in my smart home
To install Portainer, we need to first create a Docker Compose YAML file. This file contains all the information needed to create and start the container.
I like to keep all my Docker configuration files in my /opt directory on my Ubuntu server, so this is where we will create our Docker Compose file. First, let's navigate to the /opt directory
cd /optThen we will use the Nano text editor to create a new file called docker-compose.yaml
sudo nano docker-compose.yaml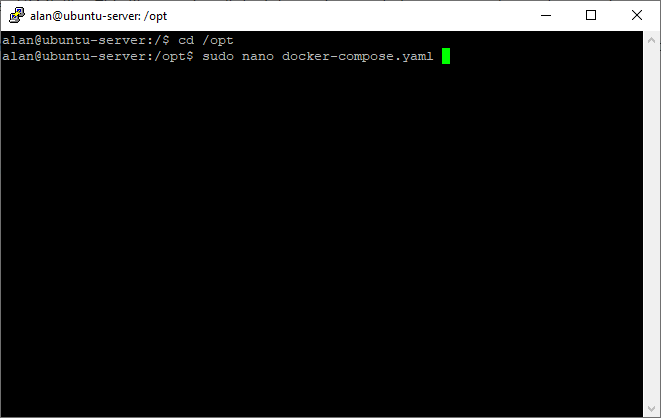
Now copy and paste this configuration information into the Nano text editor. If you want more information about what all these keys do, check out the YouTube video I linked at the top of this post. I go through all these items in more details.
You will see that this will map a directory from /opt/portainer on your Ubuntu machine to /data inside the Portainer container. This is great because it means you can recreate your container at any time and all of the configuration data will be safe and sound on your host computer. I make sure that all of my containers have their configuration data stored in its own folder in the /opt directory so I can easily update configurations and take backups.
version: '3.0'

services:
  portainer:
    container_name: portainer
    image: portainer/portainer-ce
    restart: always
    ports:
      - "9000:9000/tcp"
    environment:
      - TZ=Europe/London
    volumes:
      - /var/run/docker.sock:/var/run/docker.sock
      - /opt/portainer:/data
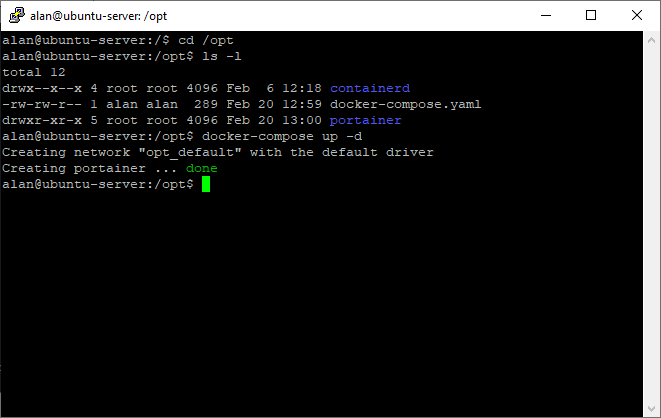
Now press CTRL + X to exit Nano and Y to save the file. If you do an ls -l on the /opt directory you should now see the file there.
We can now start Docker using the following command. Make sure you are in the /opt directory when you run this command, as it needs to be run from the same place that you keep your docker-compose.yaml file.
docker-compose up -dThis will bring up the Docker containers that you have specified in the compose file, and the -d will start them in Detached mode which means they will run in the background.
You should now be able to navigate to the IP address of your Ubuntu Server in a web browser on port 9000
http://<IPADDRESS>:9000/The first time you load Portainer you will be asked to create a username and password. This will only need to be done the first time you load it up.

Now select the LOCAL option, so that you can start managing containers locally on your Ubuntu server, and click Connect.

And you should now see Portainer running! You can select Containers in the left hand navigation menu and see your Portainer container running!

You've done it! You've got Docker, Docker Compose and Portainer running on your Linux server! You have everything you need to get started with Home Assistant and any other Docker containers that you wish to run!
Installing Home Assistant via Docker Compose
This part is easy, just follow the instructions on the Home Assistant website to install Home Assistant Container via Docker Compose!
Back at our Linux Server SSH window, we need to once again edit the docker-compose yaml file. Make sure you're in the /opt folder so you're editing the right file.
sudo nano docker-compose.yamlNow we paste in the Docker Compose sample from the Home Assistant Container Docker Compose installation instructions. Make sure that you change the /PATH_TO_YOUR_CONFIG part to the location you want to store your configuration. I once again recommend that you store it in your /opt directory so that everything is in one place. This will make it much easier to change and back up your configuration in future. You can see that I've changed the /PATH_TO_YOUR_CONFIG section to /opt/homeassistant/config in the configuration below.
Paste this into your nano text edit, underneath the Portainer configuration settings.
homeassistant:
    container_name: homeassistant
    image: "ghcr.io/home-assistant/home-assistant:stable"
    volumes:
      - /opt/homeassistant/config:/config
      - /etc/localtime:/etc/localtime:ro
    restart: unless-stopped
    privileged: true
    network_mode: host
Once again press CTRL + X and Y to exit Nano and save the configuration file.
You will now need to re-run the following command to create the Home Assistant container. You need to run this command each time you make any changes to your docker-compose.yaml file.
docker-compose up -d
The first time you run this, it will download all the containers and dependencies needed to run Home Assistant. It will probably take some time.
Once it's done, you should be able to go back to Portainer and see your newly created Home Assistant container listed!

Portainer showing the Home Assistant container
Now you should be able to navigate to the IP Address of your Ubuntu server in a web browser on port 8123 - the default Home Assistant port. This should show you the Home Assistant setup wizard.

Go through the setup wizard and you're done! You now have Home Assistant running on Docker on top of your Ubuntu server!
Managing your Docker Containers from within Home Assistant
One of the best thing about Home Assistant Operating System is that you can manage your entire environment from within the Home Assistant web interface. Unfortunately you lose a lot of that functionality when you run Home Assistant Container like we are here.
There is a workaround though! You can create iFrame Panels in Home Assistant that allow you to pipe through web site and user interfaces from your other Docker containers directly into Home Assistant! This means that you can access Portainer directly from the Home Assistant navigation menu!
To do this we need to edit your Home Assistant configuration file and add lines of configuration. As we've mapped our Home Assistant configuration into the /opt directory of our Ubuntu server, we can do this directly from the SSH session.
First, navigate to the Home Assistant config folder. If you used my configuration above you can find this in /opt/homeassistant/config
cd /opt/homeassistant/config
Now lets edit the Home Assistant configuration file using the nano text editor.
sudo nano configuration.yamlWe now need to add the configuration to add Portainer to your Home Assistant navigation menu. Make sure that you put your IP Address in place of the placeholder.
panel_iframe:
  portainer:
    title: "Portainer"
    url: "http://172.27.20.4:9000/#/containers"
    icon: mdi:docker
    require_admin: true
I added the Docker icon and also set the require_admin switch to true so that only Home Assistant Admins can see this menu item.

Once you've added the configuration to the top of the file, you can press CTRL + X and Y to exit nano and save the configuration. You now need to restart Home Assistant by going to the Configuration menu, clicking Settings and Restart.

Once it's restarted you should see the new Portainer item in the navigation menu, which will load up Portainer directly inside Home Assistant!

I do this with all my containers, so that I can manage them all from a single place.
Who needs Add Ons and the Supervisor eh!?